Propagating Orchids at Home is easy as long as you know how to do it right. Follow our guide for all the details to multiply this beautiful flower!


This gorgeous epiphyte is low-maintenance and becomes a great houseplant if provided with the right conditions and growing medium. Also, it is expensive, so if you want to multiply the one you have–quickly to have more for yourself or your friends, follow our guide on Propagating Orchids at Home quickly!
How to Multiply Orchids – The Right Time

Fall or spring is the best time to multiply this lovely flowering plant. Mostly, the plant begins its growth cycle in spring and summer, and it is best to propagate during this time when it can grow new roots quickly.
How to Multiply Orchids from Cuttings?
Propagating via cuttings is one of the simplest ways to multiply orchids. Remember that single-stem orchids grow the best from this method, and Noble Dendrobium (Dendrobium nobile) is a perfect candidate.
- Take a tray about 3-4 inches deep and fill it with a combination of damp sand and sphagnum moss.
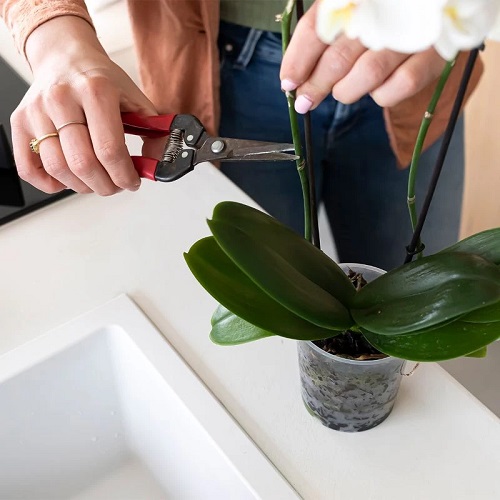
- Then, take a 10-12 inches long stem near the base of the orchid, right below the node. Now, clip it into 2-3 sections, making sure each one has at least one node.
- Dip the end in a rooting hormone and plant the cutting into the growing medium.
- Cover the tray with a transparent plastic bag and put it in a warm spot where it can receive bright but indirect sunlight for 4-6 hours daily.
- The cuttings will show new plantlets from their nodes in 5-8 weeks.
- Here’s a great video you can check out.
How to Multiply Orchids from Division?

You can also multiply orchids by dividing them. However, only sympodial orchids can be divided into more orchids since they grow sideways across the pot’s top. Orchids should only be divided when the mother plant has grown too big to handle or when the rhizomes are forming a tangled mess.
- Divide the mother plant into 2-3 sections. Make sure each division has 3 to 4 pseudobulbs.
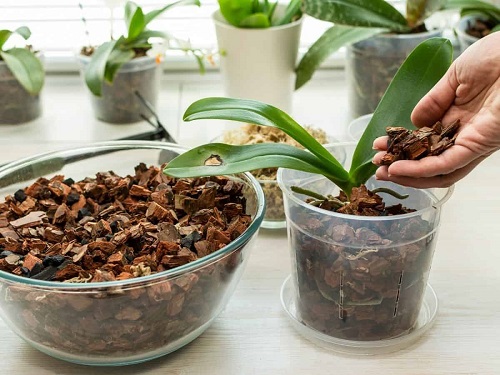
- Plant these divisions into pots filled with sphagnum moss or coconut husk/coir. Keep them at a location where they get plenty of bright but indirect light.
How to Multiply Orchids with Keiki (Pups)?

Keiki is a baby plant that sprouts on the stem of mature orchids like phalaenopsis. You can use these to grow new orchids.
- Leave the Keiki on the stem until you see a few inches of long roots extending from it.
- Once the Keiki has developed a few leaves, it is ready to be separated from the mother orchid.
- Cut the area of the orchid stem where the roots have sprouted and pot it.
- Mist and keep it at a location with plenty of bright and indirect light.
How to Multiply Orchids from Back Bulbs?
When orchids bloom, their older stems, called back bulbs, become lifeless and lose all leaves. Leaving the back bulbs in the pot won’t do any good because there is little chance of new growth. However, once removed and handled properly, these can produce fresh orchids. Follow the steps below to learn how to multiply orchids from back bulbs.
- Cut the back bulbs that no longer bear leaves from the mother plant.
- Prepare a plastic bag filled with a 2-inch layer of damp sphagnum moss.
- Place the back bulbs in the plastic bag with 1/4th of their bottoms buried inside the sphagnum moss.
- Seal the plastic bag in a spot with indirect sunlight or scattered light with a temperature range of (70-75°F / 21-24°C).
- After two months, the back bulbs will show new growth. When the leaves are a few inches long, transplant these into a shallow container and keep them in diffused light. Over the next few months, these will grow and become ready for their pots.
Propagating Orchids at Home – Aftercare
To ensure that your orchid cuttings are growing well, you need to water the new orchids until it drains out from the drainage holes when the growing medium feels dry.
Feed the new ones using a balanced liquid fertilizer, diluted to 1/4 of its strength, once in 4-6 weeks.